Kindergarten Assessment Module
Title: Understanding Patterns
Authors: Lisa Bell, Pauline Ewing, Carolyn Guelfo and Maria Ortuno
Purpose: This assessment module provides an activity in which kindergarten students make and describe patterns by pasting colored paper squares on a strip of paper. Teachers observe students and discuss their work with them, probing each child’s understanding and capabilities. The child’s work together with written teacher comments may be included in the child’s portfolio.
Reference: This module is based on material in the Investigations curriculum unit, Pattern Trains and Hopscotch Paths (PTHP).
I. Expectations
According to both state and national standards, students at the Kindergarten level are expected to have a variety of competencies with patterns. The NCTM Algebra Standard for Grades Pre-K–2 suggests that students should:
- recognize, describe, and extend patterns such as sequences of sounds and shapes or simple numeric patterns and translate from one representation to another;
- analyze how both repeating and growing patterns are generated.
The Louisiana “DEEP” standards state that Kindergarten students should “recognize and extend simple repeating patterns using objects and pictures.”
Working with patterns involves many other skills, such as:
- copying patterns,
- predicting what comes next in a pattern,
- changing a sequence in one medium (sounds, say) to a sequence in another (symbols or movements) that has the same pattern and
- creating patterns of varying degrees of complexity in a variety of media.
Some of the most important words and phrases in this context are:
- Pattern. In this work, when we speak of a pattern we mean a list (or sequence) of symbols, sounds or movements or other objects that is generated by a simple rule, such as the sequence: “ABBABBABB...”. Caution: The word “pattern” has many other meanings. For example, a dressmaker’s pattern is a shape that is used as a guide for cutting material. The word may also refer to any natural or chance configuration (the pattern of colors on a bird). Teachers need to be alert to these alternate meanings, and make sure students are not confused. See PTHP, page 19.
- What comes next? Students easily engage in discussions of what comes next. See PTHP, page 44.
- Unit, repeating unit. A pattern has units that repeat. In “ABBABBABB...”, “ABB” is the repeating unit. See PTHP, page 45.
II. Student activities
The activity in this module is based upon the “Paper Hopscotch Paths” activity on page 52 of PTHP and the Choice Time activity “Tile Paths”, which appears on pages 58—61 of PTHP.
Background: Before engaging in this activity, students should have had several experiences with patterns, including observing, describing and making patterns in several media, and comparing different patterns. PTHP contains a variety of rich, interesting activities.
Materials: Each student will need: 20 or more 1-inch construction-paper squares of a single color, one or more strips of tag board or heavy paper, about 3 inches wide and 18 or more inches long, a glue stick or a jar of paste.
Activity: Students create their own “hopscotch path” on tag board strip by gluing their colored squares to it, and describe what they are doing. They first copy an existing path, then in the second part of the activity they design their own.
Some students will be able to attach more abstract names, such as letters, to describe their patterns. According to page 43 of PTHP, this is very challenging and should not be expected for all students.
III. Student work
and
IV. Guide for interpretation
In order to protect the anonymity of the students whose work is discussed here, we will not reveal their gender. The English language demands that we choose a gender for each pronoun, and we chose always to use the feminine. Therefore, in the discussions of student work, all students are referred to as “she”. This does not imply that the student was actually female.
Class 1
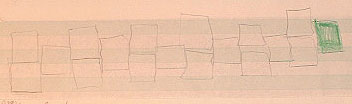
Teacher comments: We worked on hopscotch paths for three days. On the second day, we did the “Paper Hopscotch Paths” activity on page 52. The students made a hopscotch pattern on the floor using large tiles, then copied that pattern by gluing colored paper squares to a paper strip (starting from one end). After they copied the tile pattern, I (teacher) checked their work. The students drew a line across their paper strip to mark how far they had built their patterns. The tiles were removed, and the students then extended the pattern to the end of the paper.
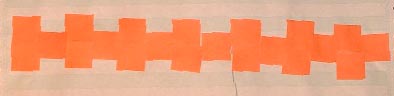
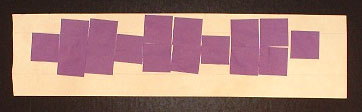
Student A. The child who made the work above understood the pattern, copied it and extended it easily. She named it “B, A, B” and she could explain how she constructed it. She could predict what could come next.
Students B. This student was able to create the pattern, copy it with the tile model, but she was unable to extend the pattern without the model.
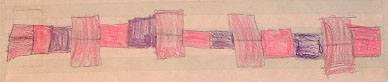
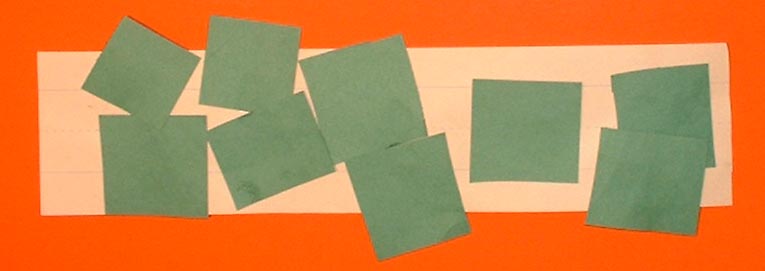
Student C. This child didn’t copy the pattern in a straightforward way. Her figure has a horizontal “stem” from which several “branches” extend. Each branch shows the root pattern she was trying to copy. We did not have the opportunity to question her about her work, but see the comments below on subsequent work by Student C.
On the third day, students were asked to complete an original pattern different than the one they made the day before. They were asked to name the repeating unit with letters or numbers.
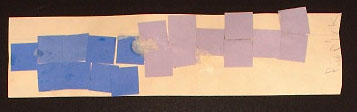
Student A made a distinct, original pattern. She named it “B-A-A-B.” (The repeating unit is actually B-A-A.) She could verbalize the rule she followed in constructing it.
Student B made the same pattern as was made the day before. It did continue correctly all the way across the paper, which was an improvement in her work.
Student C made a line of squares. She colored the squares, but the colors don’t make a pattern. This is the same child who made the branching design on the second day. In an interview, conducted a few weeks after this paper was made, she was asked to extend a simple ABAB pattern made from Unifix® cubes. She extended the stack of cubes, but lost the pattern, and did not seem to sense what was expected. In person this child seems bright, communicative and well-mannered. However, she has problems with other assignments. For example, her teacher reported playing a game with her in which the student was supposed to glance quickly at cards with 0 to 5 dots, and then after the card was hidden report how many dots she saw. The teacher went through the deck several times, but each time the student recited the same sequence of numbers, regardless of the cards she saw.

Student D. This student performed well on the Day-2 task, but her performance here is puzzling. The boxes are all the same, and the only change is in the labels they bear. When asked to explain, she said, “I made a pattern.” But she made one pattern in squares and a different one in letters. Given more time with this student, it would be appropriate explore whether she could translate patterns from one medium to another.
Class 2
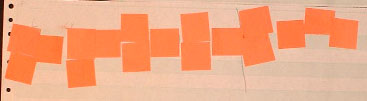
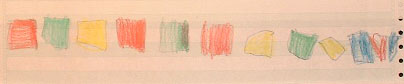
Teacher comments: In previous lessons in my Kindergarten class, we practiced copying and recognizing patterns. We used letters to describe the repeating unit in the pattern, e.g., a-b-c. We practiced clapping patterns, using various sounds to make patterns, and actually skipping patterns on a life-sized hopscotch pattern. For the current assignment I reviewed the rules of hopscotch with the students and explained that they can only use two feet. The left foot we called letter “a” and the right foot we called letter “b”. I then gave them the assignment to create a hopscotch path of their own first using tiles. Next, I will give them paper squares to glue their path. Their path had to be one that we could use in real life hopscotch. They also had to explain how they would skip or use their feet to jump in the squares. I walked around while the students created their paths with tiles. I noticed them telling each other that they could not use three feet.
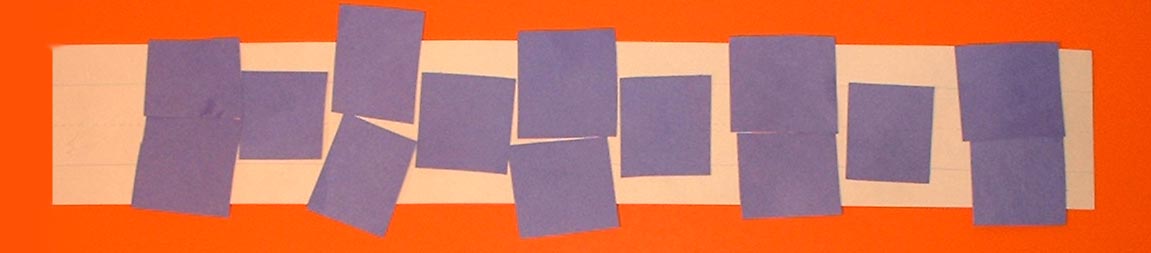
Student I produced the basic pattern that was previously modeled using the large rug tiles. She was able to tell me she had an a-ab pattern. She explained that she will hop one foot then two feet. Most students made the a-ab pattern.
Student II produced an original pattern that we had not modeled in class. She was able to tell me she had an a-a-a-ab pattern. She explained that she will hop one foot, one foot, one foot, then two feet.
Student III produced an original pattern. She was able to tell me she had an a-ab-ab pattern. She explained that she would hop 1 foot, 2 feet, then 2 feet.
Student IV had problems continuing a pattern. She started to create a pattern, but it was railroaded. She did stick to the two feet only rule. She was not able to represent his pattern with words. She explained that she would hop two feet all the way down.
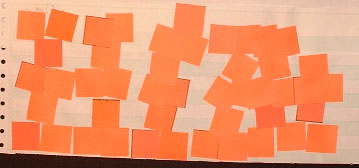
Class 3
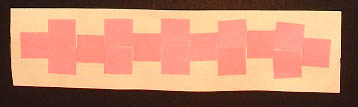
After some experience with various hopscotch patterns, students made their own patterns.
Student (1) reproduced the hopscotch pattern.
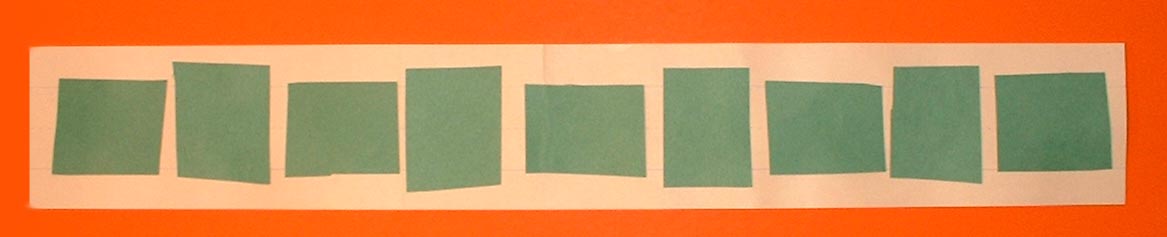
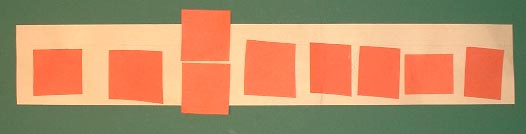
Student (2). At first glance, the pattern above seems to be just a string of squares. That would be a legitimate pattern (the simplest possible). However, if you look carefully, you will notice that the “squares” are not really square at all—one side is longer. The student has a perfect alternating pattern, in which the long side is first horizontal, then vertical, etc.
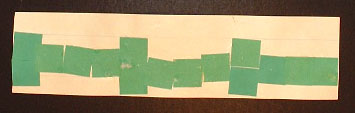
Students (3) and (4). These last examples show work of students who did not succeed in making patterns.